Retroactive Billing
Retroactive Billing allows you to change billing amounts retroactively in the event of a price renegotiation. Retroactive Billing is a common business process in some industries, especially the automotive industry, whereby a customer requests changes to the amounts charged on already invoiced orders and receives credits or additional invoices. Order Management provides a query to identify order lines that have previously been invoiced that may be subject to such retrobilling, a simple approval mechanism, and then the automatic generation of credit memos (and occasionally invoices).
Periodically, the price of an item on a sales agreement or purchase order will be changed, for example, a commodity will sharply increase or decrease in price. The customer will issue an amendment to the sales agreement or purchase order. If the price
change is retroactive, shipment quantities are identified that occurred during the retroactive billing period, and the additional charges or credits are calculated and sent to the customer for billing.
Setup
To set up retroactive billing:
1.
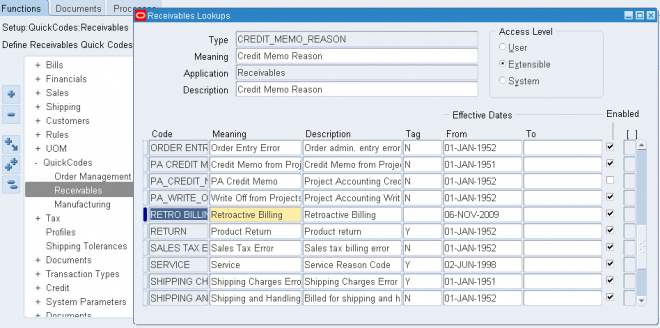
Order Management > Setup > QuickCodes > Receivables.
2.
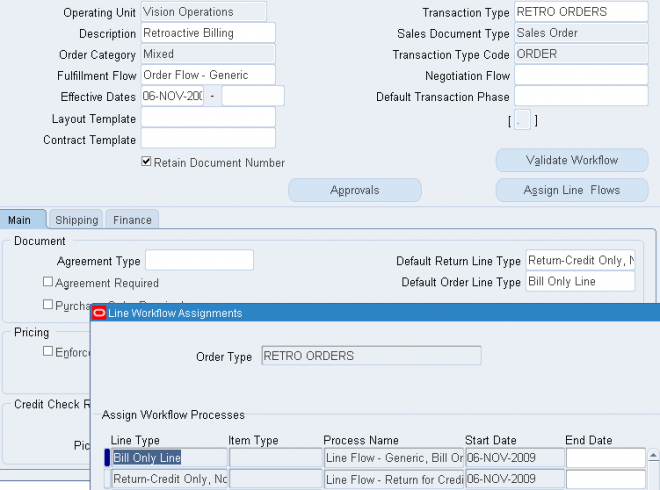
Create an order type for retrobill orders. Navigate to the OM Transaction Types window.
Order Management > Setup > Transaction Types > Define.
Create an order type to use for Retrobilling. Set up the transaction type as follows:
- Mixed order category
- No credit check rules specified
- Bill-only line type for the default order line type
- Credit-only line type for the default return line type
- This order type should not have scheduling turned on because these orders should not be visible as demand to the planning systems.
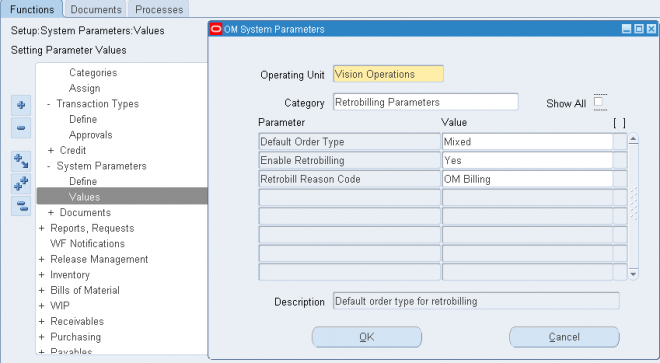
Order Management > Setup > System Parameters > Values.
Enter the operating unit in the Operating Unit field.
Select Retrobilling Parameters from the Category field.
- Set the default retrobilling order type to the transaction type you created.
- Set Enable Retrobilling to Yes.
- If you created a default reason code, choose it.
4. Create any necessary folders for the Sales Order window. The fields on the Sales Orders form that support retrobilling are seeded as Hidden. You must create folders to display the retrobilling fields. Create folders with the attributes visible, and then assign those folders to the responsibilities who will perform retrobilling.
5. Add Retrobilling Organizer to the menu. Add the Retrobilling Organizer menu item to the responsibilities that will do Retrobilling. This menu item is seeded, but is not active for any responsibility until you assign it. If you have installed Oracle Release Management, this menu item is seeded as granted, so you do not need to perform this step.
Not working
i Tried the same ibut it is not working can u give me detailed doc